Sunday, October 26, 2008

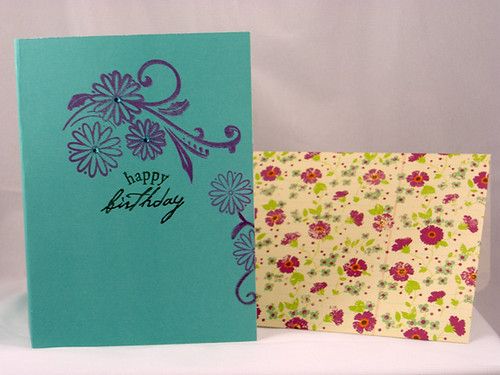
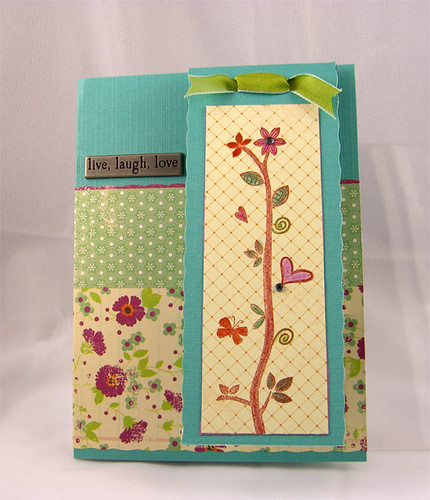
Bookmark Birthday Card


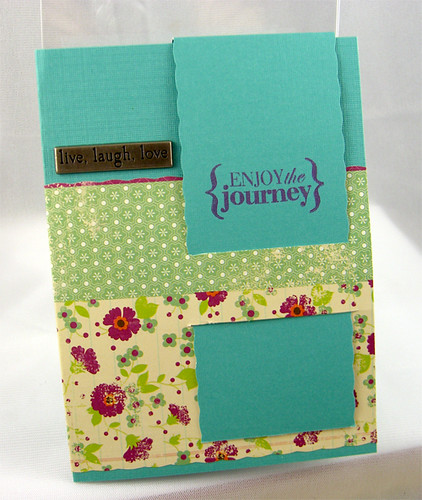
Inside of bookmark for B'Day Card.
Front of CardInside of Bookmark

Bookmark B'Day Card inside and envelope

Inside of Card with Envelope.


I made this card for my mom for her birthday. She loves to read books. She always has a stack of paperbacks for me to read every time I visit. So basically I never have to buy any paperback novels. How great is that!!

For her birthday (Mom stop reading now!) I bought a number of paperbacks that have just been released. I doubt she has read them, because she always buys them at the discount center or second hand shop. Nothing like a gift that gives back (shameless I know).

Back to the card. I saw this idea on the Hero Arts Blog and decided to make my own. Here are my ingredients:

Stamp Sets (all Hero Arts (HA))
CL150: Heartfelt Messages
CL219: Birds and Branches
CL146: Travel Journal
Inks
Versamark Amethyst
Versamark Brown
Black ink
Other -colored pencils
Embellishments
HA gemstones
Making Memories metal sentiments
Paper
Making Memories Noteworthy
other random cardstock


The bookmark idea was from one of the videos on the HA blog. I snagged the video off of YouTube. Watch below:
Thursday, October 16, 2008

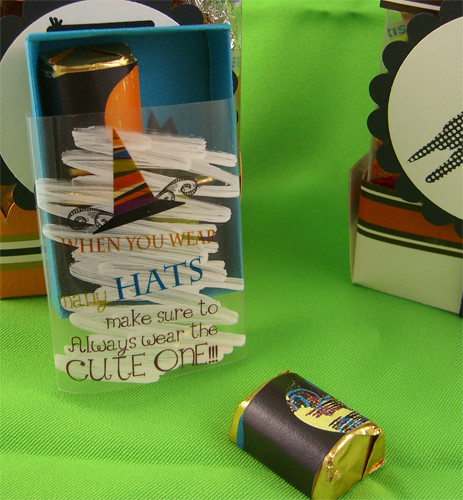
Halloween Nugget Box


Nugget-Box, originally uploaded by scrapmavin1.

I made another little gem with the Spookalicious Kit from Divine Digital. This little gem is way less fattening than the previous post! It only holds 4 nuggets, which I believe is only about 211 calories. Probably better for all, especially the little goblins who need to go to bed at night.

Details: I used a white paint pen on the acetate so graphics would show up better. I cut the paper to cover the nuggets to 1" by 3.125". Apparently you can use Avery labels (1" x 2 5/8", 5160 or similar). Pattern for the box can be found here.

Halloween Treat Boxes


Treat-boxes, originally uploaded by scrapmavin1.

I used the Spookalicious Kit from Divine Digital to create the little medallions. The kit is filled with cute Halloween motifs for kids of all ages.

To make these boxes, I first scaled the critters down in MS Publisher to about 2.125". I then printed and punched the critters out with a 2.25" circle punch. I made black scallop circles measuring 2 7/8". The box top and bottom are made of cardstock. The center portion is acetate. I created the boxes following the directions on a blog from Split Coast Stampers. I

Note: These are calorie intensive boxes! Each one takes about 10 oz of chocolate kisses. I'm trying to make the box a bit smaller. When I work out all the details I'll post the instructions.

Sunday, October 5, 2008

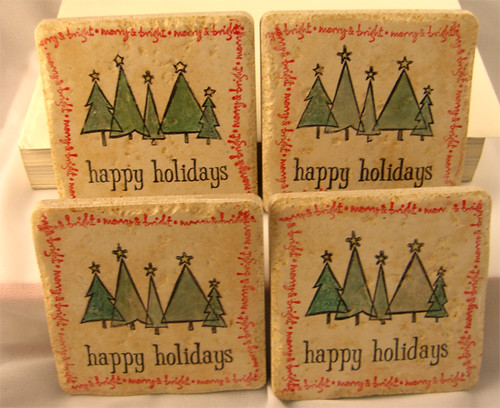
Holiday Coasters


Holiday Coasters, originally uploaded by scrapmavin1.

I made the coasters for the "Deck The Halls" contest on the Hero Arts blog. The coasters were so easy and inexpensive to make. I think I paid about 47 cents per tile. I plan to make a bunch for the holidays for last minute gifts to have on hand. The stamping/coloring for all four took about 45 minutes. I usually spend twice that on a card. I have to admit I was inspired, so I didn't have to spend the first 45 minutes thinking about what to stamp.

Stamps Used:
E2603 Trees With Bright Stars (Hero Arts)
LL046 Wavy Winter Wishes (Hero Arts)
Happy Holidays Studio G
Inks and Markers
Staz-on:Jet Black, Versa Magic: Red Magic
Marvy Markers
Krylon Crystal Effects
Agora Almond Tiles (4" x 4") From Lowes

Thin cork or felt for backing
Other useful items: baby wipes (not the oily kind!), paper towels, rubbing alcohol, blow dryer or heat embosser


Directions:

  1. Wash and Dry your tiles to remove any dust. I dried my tiles off with my heat embosser.
  2. Stamp your design on your tiles (I used Versa Magic and Staz-on). After each image I hit the tile with a blast of heat from the embosser.
  3. Color in your design with Marvy Markers or similar. Hit it with heat form a blow dryer or heat embosser.
  4. If you make a mistake with the Staz-on, you will need to use rubbing alcohol to remove it. Versa Magic only requires a baby wipe. In either case, remove the mistake before hitting it with heat.
  5. Stick your tiles in the oven. Set the temperature to 350 degrees farenheit. When the oven reaches 350, set your timer for 30 minutes. When they have baked 30 minutes, take the tiles out and let them cool.
  6. Once cool, spray with Krylon Crystal Clear. Spray in a well ventilated open area. I put up a box shield so it didn't get all over everything. Let dry.
  7. Repeat step 6, 3-5 times to get a good protective coating.
  8. For the backing I used Cork with adhesive that I found at the hardware store.
If you try it, let me know how it works out. Also, apparently Krylon has a new acrylic coating that only takes about 2 coats rather than the 5 I did. It is called Triple Thick Glaze. If you try the new glaze, leave a comment and let me know how it works out for you.

Wednesday, October 1, 2008

Posh Princess


posh, originally uploaded by scrapmavin1.

No, I'm not a princess. I am however part of Studio RA's creative Team. I wasn't sure how I felt about having my bio up on Facebook. I try to maintain a low internet footprint. After the introduction of Zigg, I might just have to use HTTP Tunnel Pro more often. HTTP Tunnel Pro effectively blocks your IP address from any site you view. If you want to get an idea of your footprint log on to Ziggs, or at the very least Google yourself.

To see complete Digital Credits click on the photo above. It goes without saying: Do not take my work or anyone else's and use it as your own without proper credit.

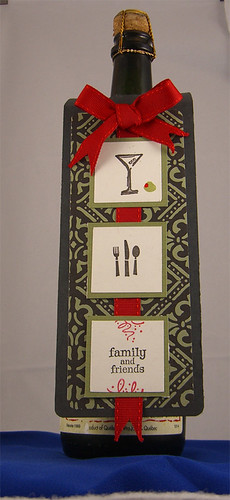
Bottle Toppers

champagne-bottle-topperwine-bottle-tag

The bottle toppers could be used for any long neck 750 ml bottle. Here are some quick instructions to create your own:

  1. Cut a piece of cardstock measuring 11" x 3.5" wide
  2. Score at 2.5" from the top of the long end. (The score line will be 3.5" in length)
  3. Punch or cut a hole aproximately 1.25" in the diameter (for some bottles the hole may need to be wider). Centered above your score line (between the top of your card stock and the score line)
  4. Decorate as you like. Click on the images above to get a description of the materials and stamps used for each topper.