
I was looking around for different challenges and contests to get myself out of a creative funk. I found this terrific blog that has sketches every week. So i decided to go ahead an do the sketch for MOJO77
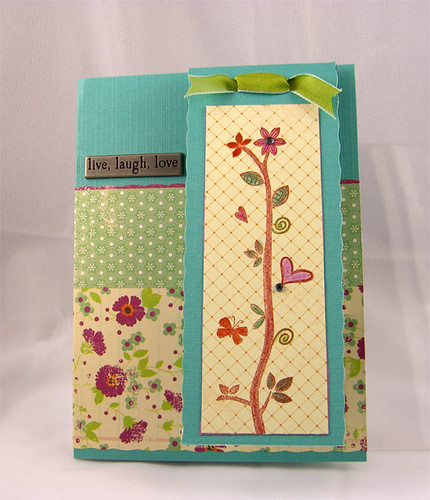
I find sketches allow me to experiment with my supplies, use up left over paper (like this card :)), and try new color schemes. The color scheme in this card is definitely out of the ordinary for me, but I think it worked. It only required two stamps from the Hero Arts Heartfelt Messages, left over paper and tag from the Making Memories Notes collection, leftover ribbon, and one piece of card stock.
Thursday, March 12, 2009
Feel Better
Tuesday, March 3, 2009
Cuttlebug Challenge #20

I found out about this great little challenge through Paper Craft Planet. It expires today for anyone reading so hurry up and get your card done. Then post the link here: Cuttlebug Blog. If you do not get a chance to post your card, definitely check out the blog . There are lots of great ideas.
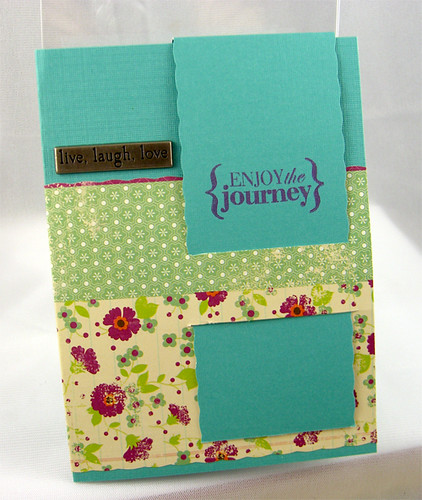
About the card: I used Making Memories "Notes" line for the embellishments and matting paper, Cuttlebug embossing folder--bloom dots, and MSE stamps.
BTW hop on over to My Sentiments Exactly Blog to get a great deal on stamps every Thursday. Two sets of Clear Stamps for less than 15 bucks total including shipping. She usually does a video on Wednesday demonstrating the stamps.
Tuesday, January 27, 2009
Valentine Scallop

Well it has been a long while since I posted anything. Too much work and too much of a "Norman Rockwell" holiday.
My last entry on Hero Arts was their Valentine blog week. I decided to break out the old Klic-n-Kut and make some scalloped hearts. I have a download link below for anyone who has a klic-n-Kut or can convert the knk file for their particular cutter. The file has the 2 scalloped hearts for making the card (brown scallop heart in photo) and 2 hearts to mount on the card stock.
I always cut 2 of anything I'm going to embellish, because if I don't I will invariably mar it in some way. When I was growing up my mother never dressed me up ahead of time and expected I would stay neat---not in my genetics.
To make the card follow the directions for the round scallop card on this HA blog post.
Note: When using the file below--cut by color, as the inset hearts overlay the scalloped hearts.
File: Heart Scallop
Sunday, October 26, 2008
Bookmark Birthday Card
 |  | . |
| Front of Card | Inside of Bookmark |
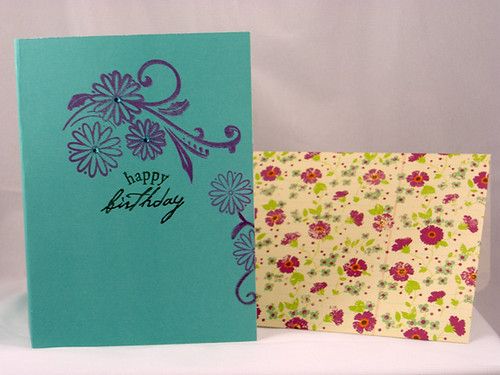
Inside of Card with Envelope.
I made this card for my mom for her birthday. She loves to read books. She always has a stack of paperbacks for me to read every time I visit. So basically I never have to buy any paperback novels. How great is that!!
For her birthday (Mom stop reading now!) I bought a number of paperbacks that have just been released. I doubt she has read them, because she always buys them at the discount center or second hand shop. Nothing like a gift that gives back (shameless I know).
Back to the card. I saw this idea on the Hero Arts Blog and decided to make my own. Here are my ingredients:
Stamp Sets (all Hero Arts (HA))
CL150: Heartfelt Messages
CL219: Birds and Branches
CL146: Travel Journal
Inks
Versamark Amethyst
Versamark Brown
Black ink
Other -colored pencils
Embellishments
HA gemstones
Making Memories metal sentiments
Paper
Making Memories Noteworthy
other random cardstock
The bookmark idea was from one of the videos on the HA blog. I snagged the video off of YouTube. Watch below:
Thursday, October 16, 2008
Halloween Nugget Box
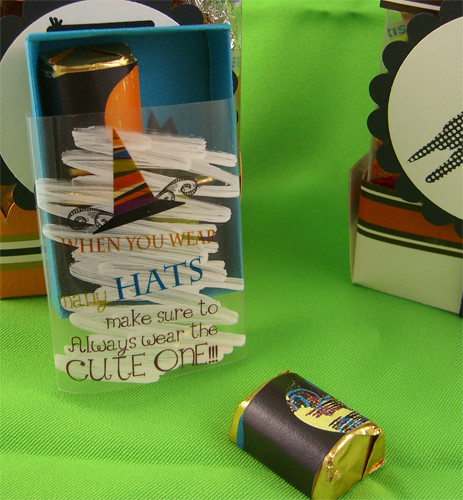
I made another little gem with the Spookalicious Kit from Divine Digital. This little gem is way less fattening than the previous post! It only holds 4 nuggets, which I believe is only about 211 calories. Probably better for all, especially the little goblins who need to go to bed at night.
Details: I used a white paint pen on the acetate so graphics would show up better. I cut the paper to cover the nuggets to 1" by 3.125". Apparently you can use Avery labels (1" x 2 5/8", 5160 or similar). Pattern for the box can be found here.
Halloween Treat Boxes

I used the Spookalicious Kit from Divine Digital to create the little medallions. The kit is filled with cute Halloween motifs for kids of all ages.
To make these boxes, I first scaled the critters down in MS Publisher to about 2.125". I then printed and punched the critters out with a 2.25" circle punch. I made black scallop circles measuring 2 7/8". The box top and bottom are made of cardstock. The center portion is acetate. I created the boxes following the directions on a blog from Split Coast Stampers. I
Note: These are calorie intensive boxes! Each one takes about 10 oz of chocolate kisses. I'm trying to make the box a bit smaller. When I work out all the details I'll post the instructions.
Sunday, October 5, 2008
Holiday Coasters
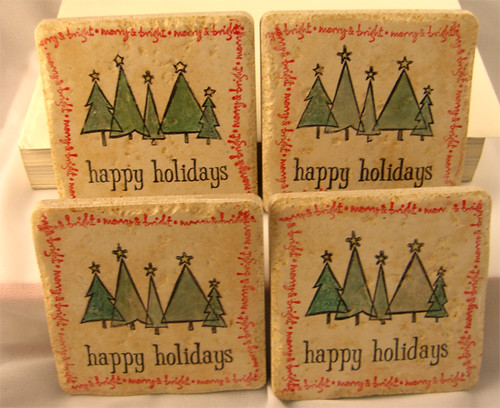
I made the coasters for the "Deck The Halls" contest on the Hero Arts blog. The coasters were so easy and inexpensive to make. I think I paid about 47 cents per tile. I plan to make a bunch for the holidays for last minute gifts to have on hand. The stamping/coloring for all four took about 45 minutes. I usually spend twice that on a card. I have to admit I was inspired, so I didn't have to spend the first 45 minutes thinking about what to stamp.
Stamps Used:
E2603 Trees With Bright Stars (Hero Arts)
LL046 Wavy Winter Wishes (Hero Arts)
Happy Holidays Studio G
Inks and Markers
Staz-on:Jet Black, Versa Magic: Red Magic
Marvy Markers
Krylon Crystal Effects
Agora Almond Tiles (4" x 4") From Lowes
Thin cork or felt for backing
Other useful items: baby wipes (not the oily kind!), paper towels, rubbing alcohol, blow dryer or heat embosser
Directions:
- Wash and Dry your tiles to remove any dust. I dried my tiles off with my heat embosser.
- Stamp your design on your tiles (I used Versa Magic and Staz-on). After each image I hit the tile with a blast of heat from the embosser.
- Color in your design with Marvy Markers or similar. Hit it with heat form a blow dryer or heat embosser.
- If you make a mistake with the Staz-on, you will need to use rubbing alcohol to remove it. Versa Magic only requires a baby wipe. In either case, remove the mistake before hitting it with heat.
- Stick your tiles in the oven. Set the temperature to 350 degrees farenheit. When the oven reaches 350, set your timer for 30 minutes. When they have baked 30 minutes, take the tiles out and let them cool.
- Once cool, spray with Krylon Crystal Clear. Spray in a well ventilated open area. I put up a box shield so it didn't get all over everything. Let dry.
- Repeat step 6, 3-5 times to get a good protective coating.
- For the backing I used Cork with adhesive that I found at the hardware store.
Subscribe to:
Posts (Atom)
